
I'm sure you were expecting a FF7 Rebirth review this week, but I will almost certainly need more time to get it ready. I'm aiming to have it done by next Friday. Sorry for the delay!
In the meantime, enjoy a small technical post on some troubleshooting I did earlier this week. :)
When working on my server earlier this week, I realized that I was getting some undefined behavior in the management console as a result of using MariaDB as my database. Ghost only officially supports MySQL 8, which kinda sucks because it's so much more of a memory hog than MariaDB. After pulling some teeth, I decided to make the swap.
Somehow, my server had just enough memory after rebooting to run both Ghost (A Node.js runtime) and MySQL at the same time. Everything that was previously broken in the admin panel now worked, but my server was pinned at about 95% memory. Additionally, if I tried making a single edit to any post on my blog, ghost would hit an out of memory crash and the server would go down. Not ideal.
My temporary solution was to resize my DigitalOcean Droplet to have 2GB of memory. While this did fix all of my memory issues and got the server back up, this new droplet was twice as expensive at $12/mo. As you may recall from my AWS nightmare post, the goal with hosting my own server was to keep it as cheap as possible, with the bar being set by Ghost's own hosted service at $11/mo.
This new droplet exceeded that cost and didn't even include backup fees, so keeping it wasn't an option. I had two choices: either migrate to Ghost(Pro) or find a way to make the smaller droplet work. I would prefer the latter, as it allows me an easy way to run my lightweight companion tools, like ghwh-proxy, without having to find some other solution to run them.
Then, in some stroke of genius, I sat down Sunday afternoon and the thought of page files entered my mind. Was my VM using one? If not, could I configure one? Let's find out.
What is a Page File?
In many computer analogies, people liken RAM to being the computer's short-term memory and the HDD/SSD to long-term memory. While this is true to a certain extent, there exist solutions to convert these two resources into one another. Need a really fast and ephemeral drive to use as a cache? Use a RAMDisk. Need more memory and have a big drive? Use a page file!
Page Files– aka Swap Files on Linux– allow you to dedicate a certain partition or file to use as extra virtual memory. After configured, your machine's kernel will them swap certain lesser-used files or programs loaded into memory in and out of the page file as needed. This effectively allows you to have more memory on your machine without having to buy more, at a slight performance hit and the cost of some disk usage.
Most operating systems come with some form of page file pre-configured because it's generally better to have slow performance than unexpected out-of-memory crashes. By default, Ubuntu Server will make a 2GB swap file at /swap.img for use as a page file. Windows creates C:\pagefile.sys whenever it needs some scratch space. MacOS has its own partition in APFS that is used for this exact purpose.
Unfortunately however, Digital Ocean's Ubuntu image doesn't come with a swap file configured by default. From what I could gather, this was an intentional decision done in the name of disk preservation, but they do allow swap files if you configure them yourself. And so, that's what we'll do!
Now, it's important to note that swap files are not a permanent solution. If your service receives a sudden influx of demand, your page file will only take you so far before it starts thrashing, i.e. copying so much data back and forth that it drastically lowers performance. In my instance, Ghost is not a stateless service and only supports vertical scaling, so I figured an upgrade would be in the cards for me later down the line anyways.
Configuring a Swap File on Ubuntu
In order to guide you all through the process, I've spun up a fresh 1 vCPU/512 MB Ubuntu 22.02 instance on DigitalOcean. All I've done on the instance was create a non-root user azure with sudo permissions and my SSH key authorized. Logging in reveals our standard terminal.
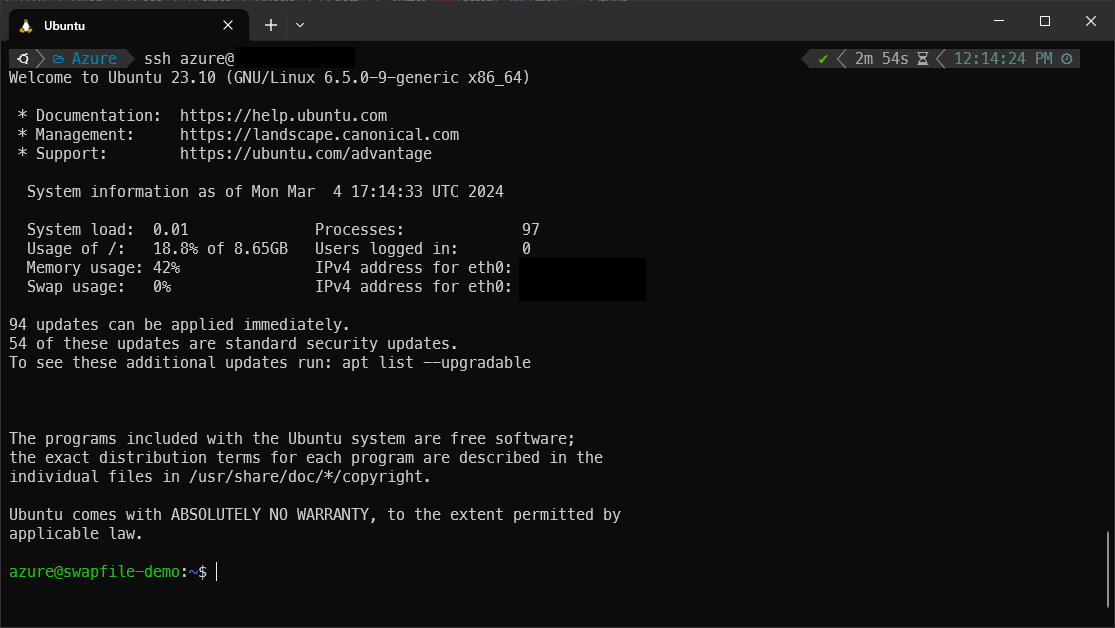
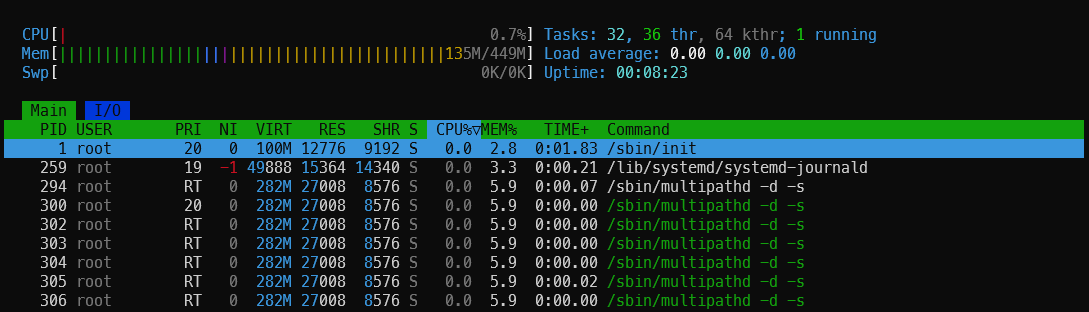
We can see if swap space is configured by default by running the free -h command. Looking in Htop reflects this as well.

So let's get started! We'll follow the Ubuntu standard of making a swap.img file in the drive root. Since this image has 0.5GB of memory, I'll add another 1GB to give it plenty of room to breathe. Create the file using the following commands:
$ sudo touch /swap.img
$ sudo chmod 600 /swap.img
$ sudo fallocate -l 1G /swap.img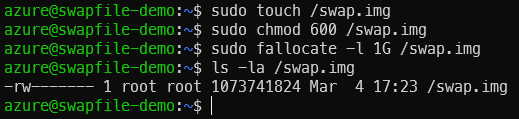
After doing so, you should now have a 1GB file in the root of your drive. This will act as our drive's swap space. Note that the swap space is owned by root and has pretty restrictive permissions. This is intentional, to prevent memory leaks.
Now that our scratch space is ready, we just have to tell the computer to use it as swap space.
$ sudo mkswap /swap.img
$ sudo swapon /swap.img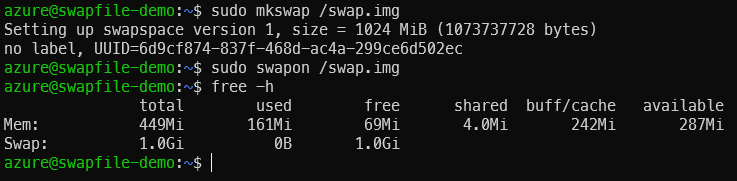
After running the swap commands, you should now see that your swap space is up and running! However, we still have two main issues: We haven't configured the swap space config to persist between boots and we also haven't told the kernel how to use the swap space. Both of these can be fixed pretty easily.
First let's start with making our changes persistent. To do so, we'll need to edit /etc/fstab, the system file where all of our mounts are defined. Make a backup, then add the following lines to it:
$ sudo cp /etc/fstab /etc/fstab.bak
$ echo "/swap.img none swap sw 0 0" | sudo tee -a /etc/fstab
$ mount -a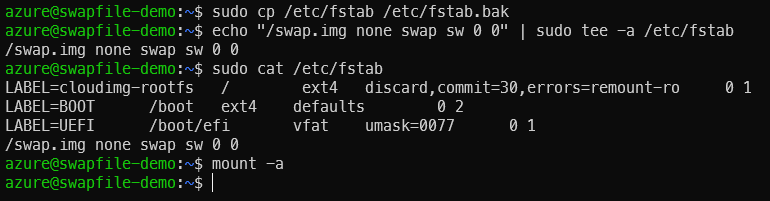
As you can see, using tee we've appended a line to the file which tells our system that /swap.img is to be used as a swap file. This file will be loaded every time the machine starts up, so it means that our changes should persist between boots.
By the way, the mount -a command is solely there at the end as a means of verifying our /etc/fstab syntax, to quell the concerns of the paranoid like myself. If that command returns an error, it means that your syntax is incorrect and needs to be fixed. If it returns nothing, your config is fine.
Now we just need to tell the system how to use this page file, specifically how frequently we want it to swap stuff in and out. On a desktop, It's permissible to use a higher swappiness value to push background apps to disk and speed up file accesses. For our servers, we want our value to be pretty close to zero for two main reasons: drive longevity and preferring applications in memory for faster responses.
Swappiness configuration is handled through sysctl. They have an overrides directory for their config that we can put a custom file into.
$ cat << EOF | sudo tee /etc/sysctl.d/99-custom.conf >/dev/null
# Custom Pagefile Vars; Made on 3/8/24
# REF: https://posts.azureagst.dev/pagefiles/
vm.swappiness=10
vm.vfs_cache_pressure=50
EOF
$ sudo sysctl --system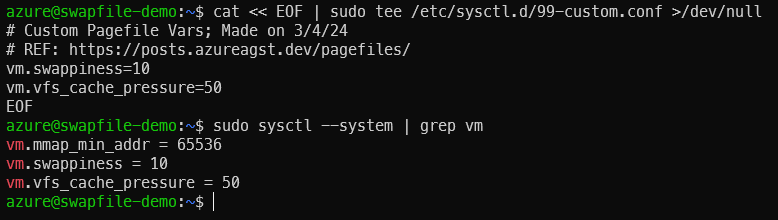
The first command above adds our custom config to the sysctl directory and the second command loads it. Same deal as the earlier mount command here; if sysctl returns any errors, fix em. Otherwise if you see your values reflected, you're set!
Reboot the machine and you should see that your settings have persisted.

Now, you might have to do a bit of tweaking to your swappiness value to meet your needs and increase stability. Monitor your services over time, and if anything crashes, consider tweaking your number a bit higher and seeing how that affects things. There's a fine line between disk usage and stability and it's up to you to find the sweet spot. Just don't go over 60 otherwise you should really consider resizing your VM instead.
Conclusion
Page/Swap files are a useful, quick solution to get just a little more memory out of your system, without having to upgrade to a more expensive tier of VM. It's not a Swiss army knife, but an easy way to get a few extra bits of memory if you need it. If you're a penny-pincher like myself, this tip might prove really handy!